
#Figma Motion
Figma Motion basics: Custom animation styles
Custom animation styles “let you define your brand’s motion language and create reusable animations that can be applied to any object.” A style is built from one or more preset animations, and the timing and easing inside it can use variables, so the motion follows your design system.
Release Notes 2026: September Edition
Figma designer advocates Brett McMillin and Kaitie Chambers take static museum app screens to a finished launch live: agent-generated keyframes become animation styles, which use easing and timing variables, so changing one curve updates every screen. Variable modes then switch the same motion between a smooth and an expressive feel. “Motion can now finally be treated as part of the design system fully instead of something you have to build every time.”
4 Figma Motion tricks worth stealing
Four Figma Motion files from Figma’s own motion designers, each with one technique worth reusing: Fabien Rousseau’s tarot cards built from nested components (with a trim-path waterfall), Brett McMillin’s rotating rings under a pile of shaders, Gilles Desmadrille’s brand animation pulling colors from library styles, and an agent-built menu.
Figma Motion basics: Use shaders in your animations
Shaders apply either as fills that generate patterns, gradients, and textures, or as effects that modify how a layer looks, and both animate on keyframes. The last 10 seconds are the interesting part: you can describe the motion to the Figma agent and have it apply the shader with a first set of keyframes for you to adjust.
Quality of life improvements to the curve editor
Six small curve editor fixes shipped since Config by Jakub Świadek, designer on Figma Motion: auto-scaling graph bounds, shift-snapping handles, arrow-key nudging at 0.01, and a scrub line showing exactly where on the curve the playhead sits.

Figma Motion basics: Easing
The first of four new short official tutorials on Figma Motion explains easing. The detail worth taking away is that custom easing curves can be saved as variables, reusable across your entire design system.

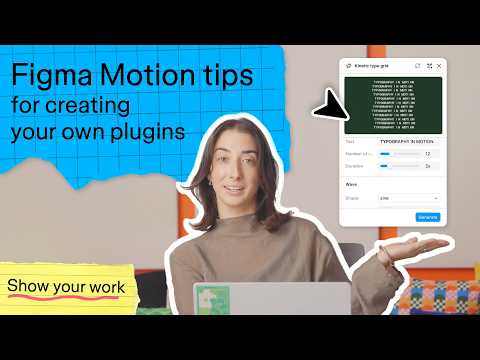
How I build motion design plugins as a product designer
Jamie Haberman, Education Designer at Figma, builds a kinetic type plugin with the Figma agent.
Figma Motion basics: Time-stamped comments
Comments attach to a moment on the timeline, and a single comment can carry several timestamps, so one note can flag three separate problems in one pass.

Figma Motion basics: Path trim
“Path trim lets you create animated lines by controlling how much of a path is visible at specific points in time. You can use path trim to create draw-on or erase effects, handwriting animations, and looping spinners.”

Figma Motion basics: Animation styles
Two tiers of preset – basic animations move a single property, composite ones bundle several plus custom easing out of the box. Once applied, an animation shows up as a blue track on the timeline, where you drag the track itself to set delay and drag its handles to set duration.

Intro to Figma Motion for Edu with shader effects and fills
An hour with Miggi covering the full surface of Figma Motion: keyframes and eases, anchor points, easing and timing variables, loop tracks, motion paths, trim path on strokes, shader effects and fills, and a first look at 3D transforms. If the playlist above is the primer, this is the deep end, and there’s a community file to follow along in. One EDU caveat worth knowing: the Figma agent isn’t available on Education, so students work with the prebuilt shader presets instead of prompting their own.
Figma Motion basics
Figma’s official intro series for Figma Motion, three short videos covering the timeline, keyframes, and motion paths. Start with the keyframes one, which quietly makes the biggest point: any layer property with a diamond icon can be animated, and that includes fills, effects, and shaders.
Nesting and framing animations
Miggi packs two Figma Motion tricks into one tip. Nest your animation inside a frame and the parent becomes a camera you can pan, zoom, and rotate. Separately, J and K jump the playhead to the next and previous visible keyframes.
Motion for people who are scared of motion software
Laura Fehre, Designer Advocate at Figma, teaches Motion to people who freeze up the moment they open motion software, by letting the Figma agent do the first pass. Prompt the animation, watch it build the keyframes, then refine the curves and springs yourself.
Easily animate loaders with the arc tool and Figma Motion
Miggi builds a loading spinner from one ellipse: swap the fill for a stroke with shift+X, sweep the arc tool to 75%, then round the end caps. In Figma Motion, the move is keyframing only the sweep value and deleting the start and ratio keyframes Motion adds by default, so it runs from 0.25 to a full 100%. Duplicate and stagger a few for a nested loader.
Principles in Motion
A deep dive into the principles that separate intentional motion from decoration: easing and timing, anticipation, overshoot, follow-through, hold, and settle. The piece makes a compelling case for grounding animation in real-world physics and film editing rather than trending motion work, and lands on a point worth keeping: as AI tools make quality motion faster to produce, skill and restraint matter more, not less.
Meng To's tutorial on how to use Figma Motion and shaders
Meng To, founder of Design+Code, shares his first hands-on session with Figma Motion. The tutorial runs through basic animation, auto keyframes, and agent-prompted stagger animation, then pivots to shaders — which is where it gets interesting: he animates dither and lens distortion settings over the timeline, and builds a custom Matrix-style shader from scratch using the agent with a screenshot as input. A good complement to the official Figma tutorial below, which focuses on design systems and 3D transforms — this one is messier and more exploratory, which makes it easier to follow along.

Get started with Figma Motion and 3D transform effects
Figma’s official getting-started tutorial for Motion. The three-part structure covers agent-assisted animation (prompt it, then refine in the timeline), preset animation styles, and manual keyframing. One thing that stands out: animation built on a component automatically propagates to every instance, so you animate the play button once and every media player in the file picks it up. Motion tokens are new variable types for timing and easing, and Dev Mode now shows a Motion panel with ready-to-ship code (JSON, React, CSS) alongside the design.
